Update entire qubes installation with a script

Thank to Chris Laprise I have now a great update script for my Qubes installation.

I know it’s bad habit to pollute dom0, but I looked distrustfully 😉 through the code and it seems efficient and not in any way harmful.

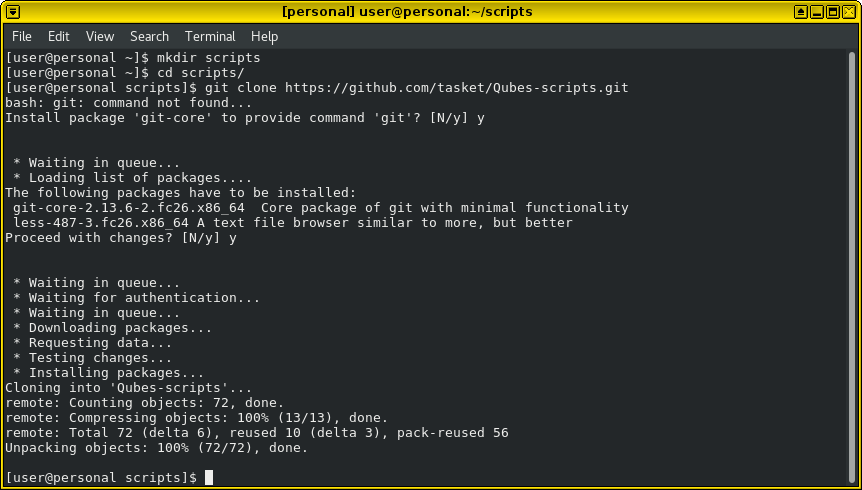
First we get with git 😉

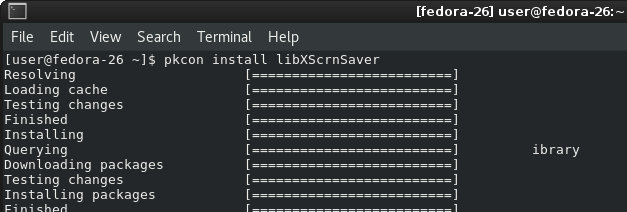
If you are like me, you don’t want your template to have git, but only install it every time you need it ;), do the following and fedora-26 is polite and helps you out:

In appVM/dispVM, etc.

  • git clone https://github.com/tasket/Qubes-scripts.git

For now we only need the 1 script:

In dom0:

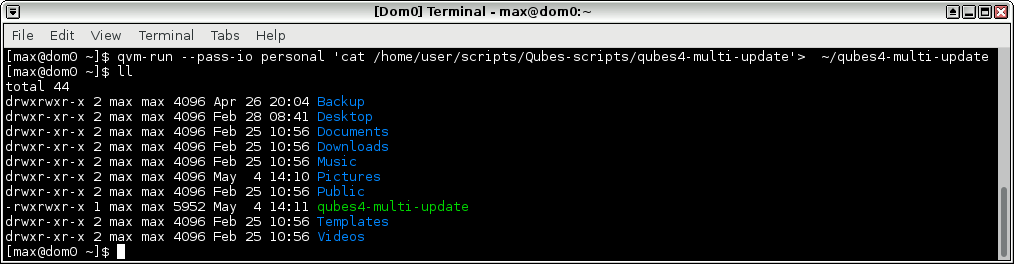
  • qvm-run --pass-io <src-vm> 'cat /path/to/file_in_src_domain' > /path/to/file_name_in_dom0

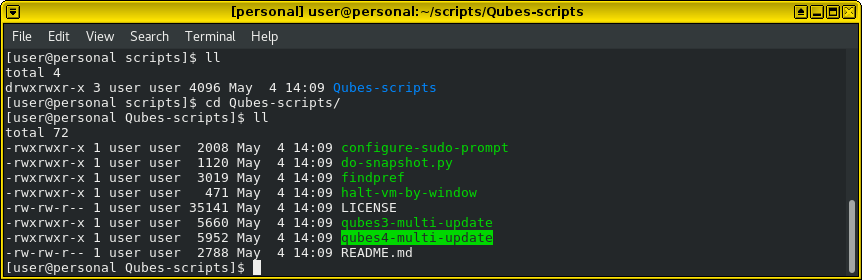
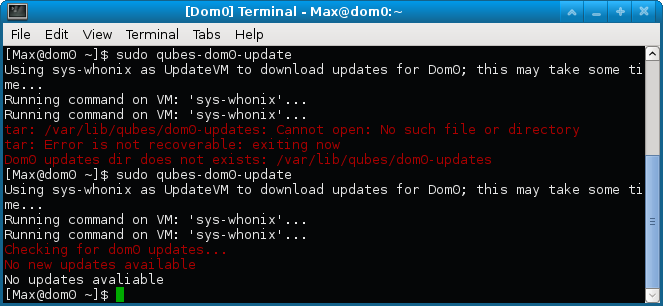
Now we have it in dom0:

We can try it out on a fedora-26 template:

in  dom0:

  • ./qubes4-multi-update -l fedora-26

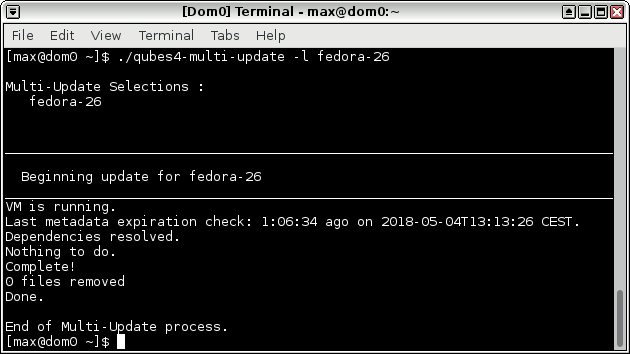
Boom, already updated, but you get the picture.

The following command updates only templates with available updates. That should suffice for generic usage.

  • ./qubes-multi-update -a -l -t

I found a small error when running an update on whonix-ws, but otherwise it runs beautifully.

UPDATE 2018-05-04:

When using Qubes 3.2 running the above command includes the standalone VM’s. Just so you know.

UPDATE 2018-12-28:

Chris has updated the script (ref: https://groups.google.com/d/msg/qubes-users/YKAp0_1MFfk/mTyQTM9JEgAJ)

Now I use with unattended and everything just rolls through, nicely:

  • ./qubes-multi-update -a -l -t -u

KeePassXC on Qubes

Until 1Password takes the Linux community seriously, KeepassXC is the preferred choice for me.

1Password offer a cloud based solution with only chrome-integration, almost like KeePassXC has for Firefox, Chrome, Vivaldi and Chromium, but Chrome wont be my preferred choice just yet. And also since Cloud solutions has a broader attack vector, there is no need to put the crown jewels on display, when sensitive hacks are almost happening daily on the internet.

If I get a trojan on my active computer, or buy a chinese keyboard, AND have my password database in the cloud, they can login and download it and harvest all my precious passwords without effort and without any fancy cracking efforts. Therefore if you enjoy cloud services, you might consider to use MFA to access the cloud (and hope your 2nd factor device is not pwned too 😉 Remember that SMS might be in clear text through airwaves that anybody might listen to or abuse in other ways.

Keeping an offline password manager is what I feel comfortable with, so that is what my current needs are.

And here, KeePassXC seems to be the best multiplatform solution around. And an important thing to remember is that if you have an offline password manager(or password manager installed in an “air-gapped” VM in Qubes, the risks of breaches are smaller even with bugs in the Password Manager software, since nothing directly enters a VM without network connection. So you need bugs in the underlying OS to get breached. Not impossible, but more rare in hypervisors with an offline vault than a traditional OS without.

Air-gapped VMs are also used as Split-GPG and Bitcoin wallets, so I guess its a bit more secure. Enhance your setup with a copy of your database on a PIN-enabled secure USB and sync it to your vault VM regularly.

P.S. Yubikey supports KeePassXC, but not as traditional 2FA

In Fedora 27 and later a newer and better version of KeePassXC is available. Remember to enable recommended security settings:

sudo yum install keepassxc

– Database settings – encryption – Argon2.

– General – Basic settings – Automatically save after every change.

– lock the database after use (time, immediately, etc)

If you use Qubes, you can have the password manager in the “vault” VM and ctrl-c, ctrl-shift-c in the vaultVM and ctrl-shift-v and ctrl-v in the destination VM to feel safer. You can also have a secure password file in vault and a less secure in another vm with internet access.

If safety is not the biggest issue for you and you use multiple computers, then install firefox addon, dropbox and sync selectively :

In Firefox addon:

yum install dropbox.rpm (otherwise dependencies are left out)

Point your KeePassXC to the synced folder .kdbx file.

Enable 2factor authentication to dropbox to prevent ease of access for bad people.

Configuring Cisco ASA VPN on Qubes 4.0 with openconnect

I have rewritten my VPN guide for Qubes 4.0, since my old post from 3.2, didn’t work out of the box and solutions on the web, didn’t sit well with me. I chose to investigate how I can make a guide like the last one, just for Qubes 4.0.

Here it is, although the changes are few:

Create your vpn appVM, based on your preferred fedora template:

Add the ‘network-manager’  as a service :

Tur on the AppVM, and when the network icon appears, add the vpn connection:

Select the OpenConnect type:

Insert FQDN in the gateway section and save.

Start the VPN connection:

Type yur password and the connection will be established and your icon look like this:

Cloning fedora-26 to fedora-27 template Qubes 3.2

UPDATE: Qubes officially have support for Fedora-27 now:

and fedora-28

————————————–

I suddenly got a message that there are new updates to fedora-26 and those updates was the release of a fedora-27.

Sadly, there is no qubes fedora-27 template :

so I think we will have to follow the guide used in fedora-25 -> fedora-26 and see if we can use that for fedora-26 -> fedora-27 (and probably 28 also…):

clone the VM

prepare the new template and start gnome-terminal to configure the new release and run updates

See the error, showing there’s missing fc27 repository in qubes 3.2.

disable all qubes repositories and update to fedora 27 in the TemplateVM and select 26 hoping the differences are not too many ( list here).

I think it’s better to use the fedora-26 qubes repo, from Qubes 3.2 on fedora-27, than  trying the Qubes 4.0 fc27 repo, but I have no actual knowledge backing it up. Funny that Qubes 4.0 has a fc28, when it hasn’t been released properly yet. That is amazing 🙂 Great work, Qubes-team. (I couldn’t get it to work on 4.0, though)

Change fc$releasever in the repo-file to fc26, before the dnf update, and run it:

After applying updates, shut down the VM and clean up the files in dom0:

And voilá. The TemplateVM is ready to go, without any warranties, but it seems with KeePassXC 2.3.1 instead of 2.2.4, as an example (Better browser integration :).

And with Fedora 28 in beta, it might be a good idea to do the above again, just with fedora 28 and qubes fedora 26 repository.

GnuPG2 in thunderbird with Enigmail on Qubes 3.2

Let’s start generating some keys that do not expire. We can always revoke them, if neccessary instead. No need for expiration, if they are kept secure. All of this activity should be performed in ‘vault’, so the below is just for educational remembrance. Remember to create a revocation key that you put somewhere safe, just in case your machine get’s stolen or breached:

[user@untrusted ~]$ gpg2 –full-generate-key

Enter the passphrase for the keys, when done typing infomation.

The following is just for showing that we need to move the mouse, etc. to generate random data. It’s over, literally, in a second.

Get the fingerprint of the key:

[user@untrusted ~]$ gpg2 –fingerprint

So now we have a private and a public key stored in ~/.gnupg/

Be sure to ulpad to keyservers, if you are to use it to communicate with strangers.(searchable):

$ gpg2 –keyserver keys.gnupg.net –send <keyid>

Also maybe send to pgp.mit.edu and subkeys.pgp.net or whomever seems sensible.

Remember to generate the revoke certificate, just in case 🙂

$ gpg2 –output revoke.asc –gen-revoke  <keyname>

And if the stuff gets stolen, breached or whatever, you can revoke it locally with an import:

$ gpg2 –import revoke.asc

And remote revoke it by doing the following on all keyservers you submitted to

$ gpg2 –keyserver hkp://pgp.mit.edu –revoke <keyid>

We can use gpg2 to encrypt, sign and decrypt messages, but if we wan’t to use enigmail in thunderbird, we need to do the following:

Start thunderbird:

[user@untrusted ~]$ thunderbird

After setting up the mail account, configure the enigmail plugin, if we are comfortable using that:

Select the fast and easy setup…

It looks in the users .gnupg directory and asks if it’s ok, and I guess, yes.

Now, we can start signing and encryping messages 🙂

exFAT on sys-usb on Qubes-OS 3.2 (Sony RX100V picture offloading)

Red Hat does NOT support exFAT, due to Microsoft license restrictions(rumor says), so therefore SDXC cards above 32GB is a nogo.

Debian has support though, so change your sys-usb template to run on debian(greyed out in picture, because machine is running):

You have to reselect the terminal in the tab “Applications”, since the app and location isn’t the same. But then you can mount the device properly:

Voilá:

Then copy the files(or move or whatever) to the machine of your choice to manipulate or store them for viewing and backup:

And wait for it to finish …

Here they are:

If you moved them, you don’t have to clean your memory card, but I just wan’t to be sure all formats are ok, before deleting anything ;

Qubes 3.2 – Dom0 updates broken

The following error, updating dom0 :

  • tar: /var/lib/qubes/dom0-updates: Cannot open: No such file or directory
    tar: Error is not recoverable: exiting now
    Dom0 updates dir does not exists: /var/lib/qubes/dom0-updates

Seems to be fixed with the following commands in the template used by your updateVM (my case whonix-gw, which is gateway for sys-whonix updateVM:

sudo mkdir /var/lib/qubes/dom0-updates
sudo chown user:user /var/lib/qubes/dom0-updates

Restarting the updateVM is needed for the VM to reload with the correct setup.

Reference: https://github.com/QubesOS/qubes-issues/issues/3620

Connecting to Cisco ASA VPN on Qubes 3.2 with openconnect

OpenConnect on Qubes 3.2. Using a vpn ProxyVM to connect to Cisco ASA VPN .

Create a new vpn ProxyVM using fedora-26 template:

Due to a bug in software from Fedora 25 and later, you have to install a ‘NetworkManager-openconnect-gnome’ package, (which is not in the template by default) or you will get an error creating the VPN Connection in vpn:

So install the package:

Create the Openconnect connection without errors:

Configure the site:

Type your username and password, when connecting, and you’re good to go.  This also supports 2FA.

When starting the ProxyVM, the extra network icon appears in the upper right corner and you can use it to connect. Very neat, indeed.

VMware Horizon View Client on Qubes 3.2

Start the selected TemplateVM (I selected fedora-26, since it’s default in Qubes). Clone it if you want.

A prerequisite is the Libxxs shared object, but here was provided a solution for installing it i Fedora.

So, since this is a prerequisite for the VMware Horizon View client, install it now:

Answering yes to any questions.

Start the terminal in  and copy the download link from a browser (I try to minimize the use of direct internet access in templates). Download the client.

make the file executable and Install the client(remember sudo ;):

Obviously select yes:

Choose whatever your heart desires:

Await the copying of files…

 Choose scan to see if everything is in order:

Chose close and start the client:

Begin configuring your environment:

UPDATE Thursday 19 July:

With newer client I exprienced black screen when logging on to VDI vmware horizon, but disabling H.264  helped.

You can also start vmware-view with the following to avoid black screen:

# vmware-view –enableNla

Assign USB-disk to VM in Qubes4.0RC4

Qubes has a new graphical feature that enables you to attach a USB device to your VM and then mount it on the VM

The above “work” was already selected and ready for unmounting. Lets go to the VM and list the added disk and mount it:

If in doubt which disk is which, deattach it in Qubes Manager and fdisk -l again to see what’s missing.